


Changing the tank is a procedure that virtually all aquarists have done at least once in their life, or that in any case, they will do sooner or later .

The reasons are various but the most classic is certainly an upgrade especially in terms of available space, or to switch from one tank, adapted to be a marine aquarium, to one specifically made to be marine aquarium. Or for drastic reasons such a tank that is threatening to break.
In all these cases the important thing is to act very quickly, so that the water change could be done quickly and in a day. Taking advantage from my experience we had in April 2007 together with friends of AcquaPortal, I would try to draw an ideal protocol to be prepared in those agitated moments. To do this I will use many pictures and also several videos that we shot in that hectic day.
I begin by saying that I was totally lost… and then I can only thank all friends of the forum who came to help me. Without them I would not have accomplished the task, and thisi is also the reason for this guide, to help everybody to do it better. So a special applause goes mainly to them (in alphabetical order): Adp80 (Simone), Lumaz (Giorgio), MarcoAP (Marco), Max (Massimiliano), Mbenassi (Matteo), Pfft (Andrea), Zanna Bianca (Maurizio!) Thank you all guys!
Since we have to make a tank change we have to have ready all the equipments of the new tank, and especially the new tank and new support as well as all the equipment that we could change into our transition from one aquarium to another. In my case I changed tank, sump, calcium reactor and cabinet. Beyond that is a good idea to have at least a couple of teflon tape and a pack of Tangit, if the new tank will be glued PVC pipe like this you’ll see.

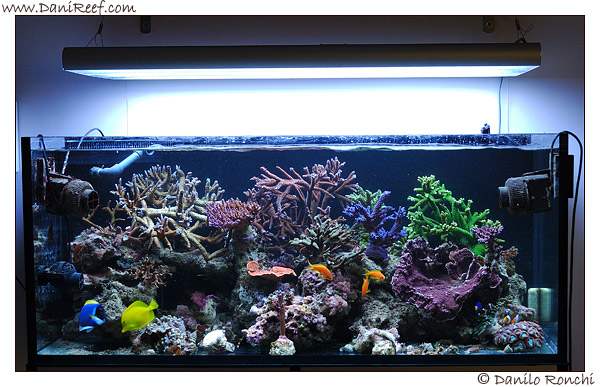
this is a picture of the old tank a few days before the change
Then we have to prepared a series of bowls and containers where host corals, fish and live rock. It ‘s very important that these containers, also the styrofoam are good, are sufficiently large and they all have at least one heater and a pump movement, even better if together with the pump there will be an aerator. Obviously a lot of empty cans that will need to transfer water from one tank to another.
When you take corals from water it is very important to immerse them immediately in various containers, making sure they do not touch with each other. The fishes however can be safely placed in tanks together with corals. It could be good if we put also live rocks in a container with same attention reserved to corals, if you want to reuse them as usually happens in a tank exchange of this kind, but it could be enough keeping them “dry” but moist.
.jpg)
.jpg)
Corals and others inside containers
Moving from one tank with certain capacity to another, in my case from 320 liters to 390, it is essential to have ready a lot of water, much more than the difference between the two tanks would suggest. I had already prepared a few days before about 200 liters of new water, perfectly salted and at the right temperature, which was into a big container with a pump, and we use it all! This is because you can not recover all the water that was in the old tank, because a few centimeters of water that collects on the bottom will be filled with sediment (roughly the last 5-10 cm), because water that remains in bottom of sump or in the various reactors and we would not be able to physically transfer.
Finally, the preparation of everything that has to take into account the ambient temperature, we were in late April, and then the temperature was acceptable, only slightly cooler than normal in the management of the aquarium, but the temperature management is essential to avoid problems to fish and corals.
So here we are ready to begin our effort.
I state that our security is an absolute priority and although we are all accustomed to playing with water and electricity I advise you to proceed with the utmost prudence to avoid taking any shocks that are likely to occur when water and electricity are too close. If possible, turn off the light, especially if you have a line dedicated to the aquarium.
The first step in any case is to turn off the main aquarium lighting! It seems trivial, but a bright light can burn the corals when they are left without water.
In our case we have left only two blue neon t5 to allow at least to see something in the tank, which among other things would have been filled shortly with suspension.
.jpg)
The aquarium is emptied, note the microphthalma out of the water even more impressive
The second step is to begin to empty the tank, although not completely to avoid any problems to fishes, crustaceans and invertebrates. To do this I recommend you to have a big pipe, as shown in the video we have used an exhaust pipe of the washing machine, or with conventional pipes we would have really put too much time, and speed is an important factor in the operation we’re going to do. Of course it helps to be many people at work, because you can use several tubes and then fill multiple tanks at once, that will start to fill all the containers available that will have to keep our fishes and corals. Containers, as we have said, that will be soon equipped with heater and pump to circulate the water.
.jpg)
The colors also under blue lights, even out of the water are incredible!
The second step is the extraction of corals, trying to put them wherever there is place, making sure not to make them touch each other, you can now also remove urchins and snails which could be without water at this moment. Don’t think to catch fish now, since would be impossible to catch them until there are rocks in the aquarium where to hide.
.jpg)
The new sump used for keeping corals, you can see the green Acropora nobilis, the yellow of a large Zebrasoma and one bigger Acropora formosa.
Soon will be the turn of the live rocks, which as we have said must be kept wet.
.jpg)
Live rocks…
Finally when only a few inches of water are left, you can start thinking about the fish. Be careful though, a couple of details. The fish are terribly afraid, so you will catch them very easy, but the use of a small fish net, especially for bigger fish, can lead them to get trapped in the net, so I advise you to use some bowl of salad, which together with the lack of water has proved very easy to use to capture one by one all the fish. During my tank change, the use of the net give us many trouble with my Acreichthys tomentosus, so we had to use the scissors to cut the net, and some small piece of net got stuck on the fish, and is gone only after several hours of swimming in the new aquarium.
.jpg)
A small aquarium Askoll Tenerife 55 with small fish and shrimps
Once caught the fish we are almost halfway there.
We proceed to switch off any residual equipments of the aquarium, because no longer needed, and to remove the sump from the old cabinet, all pumps and accessories, aquariums computers, and we put them ready to be reused immediately. Then you remove the tank and the cabinet, in our case there were two flights of stairs to deal with … 🙂 And then we proceed to bring home the new tank, if you have enough place at home you’ll be better to anticipate this move, so you do not have to spend so much time while the fish are waiting for the new home.
In my case we had an alluminium cabinet (which I have hated because I never managed to make us a decent forniture around it) and the tank. Particular attention should be given to the new position, trying to keep as much as possible the new aquarium horizontal with a bubble level. With the alluminium cabinet is quite simple because under each leg there is screw pin … But do not try to do as we did, that is, to put in the right place the alluminium cabinet without the tank above, because then it will be impossible to put the tank without moving his legs 😉 You’ve been warned!
.jpg)
Pfft on the left and *** dani *** on the right trying to put the alluminium cabinet on level
Now all that remains is to fill the new tank … although we have decided to stop for lunch, for an excellent and tasty piadina (special bread of our country…)!
.jpg)
Tank and cabinet finally mounted
Returning to the work we had to start working with Tangit and Teflon to connect the PVC pipe and enabling to its toxic components to evaporate before filling the tank, and only then we should have think to live rocks, instead of we was being taken from the hurry and we dedicated to rocks … or better … pfft and Mbenassi have built my new rocks layout … since I was in total panic … and I thank them because the result was fabulous. Especially if considering the objective difficulties due to having lots of rocks (although I has taken out at least ten kg) and not too much space to put them, even considering the enormous corals which had to manage.

.jpg)
Acropora microphthalma on the left and formosa on the right, respectively in the arms of ***dani*** and pfft
In the video we also see when we have “splitted” an Acropora formosa a bit ‘too grown up, armed with screwdriver, the movie is the fourth.
At this point we began to put the water as we had predicted and as expected has created a huge suspension, not allowing us to see much. We then placed the fishes, without any adaptation, because temperatures were identical and the starting water the same, the new water was inserted as it were a partial big change of water, and has been inserted only later.
.jpg)
Pfft inserts Acropora microphthalma under the watchful eye of mbenassi
After filling the tank, we had to connect the sump, turn on the skimmer and we was happy to have all the cables lain in the ground, big works in only one day … the important thing was that everything worked well and that the losses were minimized. Aquatronica has been linked only to be able to manage all equipments without having to employ temporary timers.
.jpg)
MarcoAP in the foreground and Lumaz in the background contemplate the work
It’s important to remember to include a lot of active carbon in the days after the water change as the corals have certainly suffered, and then the release of mucus by the SPS and terpenes from the soft coral is plentiful. I suggest you also to set your skimmer very wet so as to remove a lot and quickly, even considering that the new tank, new pipes, the Tangit will have a strong inhibition of the skimming and beacuse of that the skimmer will start working not so soon.
Here the finished work as it will look a few days later, when there will be no suspension in water
All this change took place without any loss of fish and corals, and for that I thank the friends of the forum who have supported me and encouraged in most times and have made important decisions instead of me. Thanks guys!
But everything has been made possible thanks to the extreme organization that has allowed us to have everything on hand without major hitches. One thing I feel strongly to recommend, if you have very large corals, such those I had, it would be good to give them away before the change and do not place in the new tank, because they are the ones who suffer the most during change, which will be those produce more mucus and could to kill with their secretions many other smaller corals and may even weaken themselves to the point to die in the weeks following the new layout (it happened to me with a huge formosa, unfortunately).
Good luck!
.jpg)
The always marvelous view that a lighted and coloured aquarium can give to one house
Now that you have read all, you can enjoy videos we shot that day, with many to Max and Zanna Bianca for their technical support.
The first video is done by linking all the pictures taken from a webcam, so you can see all the day
But if you’re interested in seeing more detail the various phases of the day and also want to hear what we said, here you can see the four videos, which in total lasts around 20 minutes.
Tank change part I: Emptying
Tank change part I: Disconnection
Tank change part III: Assembly
Tank change part IV: Reassembly
So recapping the basic steps for the success of a tank change in a single day are:
1. Have friends that could help you, alone is all tremendously more complicated
2. Have everything you need but also salt water already at room temperature in quantity, containers, heaters, pumps, and Teflon Tangit
3. Do everything calmly
4. Disconnect the pump and turn off the stronger lights
5. Remove 3/4 water from old tank
6. Take out the corals
7. Remove the rocks
8. Remove the fishes
9. Unplug everything, remove tank, sump and cabinet
10. Install the new tank at perfect level
11. Make all connections with Teflon and Tangit
12. Create the new rocks layout
13. Fill the tank with “old” water
14. Insert the pump movement even if kept to a minimum
15. Enter the corals if these will be covered by “old” water
16. Fill with new water
17. Any further insertion of corals
18. Place fish
19. Movement pumps up to speed and in the right position
20. Turn on the return pump and skimmer
21. Inserting a lot of active carbon, at least twice in grams compared to your litres, that is if the tank is 400 liters enter at least 800 grams, to be removed after 3 days and replaced with the usual amount of active carbon used
22. Check values and corals
Have fun!
Scopri di più da DaniReef - Portale dedicato a Acquario Marino e Dolce
Abbonati per ricevere gli ultimi articoli inviati alla tua e-mail.


vederti frammentare quell acroporona mi viene male…non so come fai 🙂