

Let’s do the measurement
Once opened the package you insert the battery. You have to open the door at the base of the egg with a small phillip’s screwdriver. You unscrew the only screw in the inferior door. Once closed the device is ready to be used.
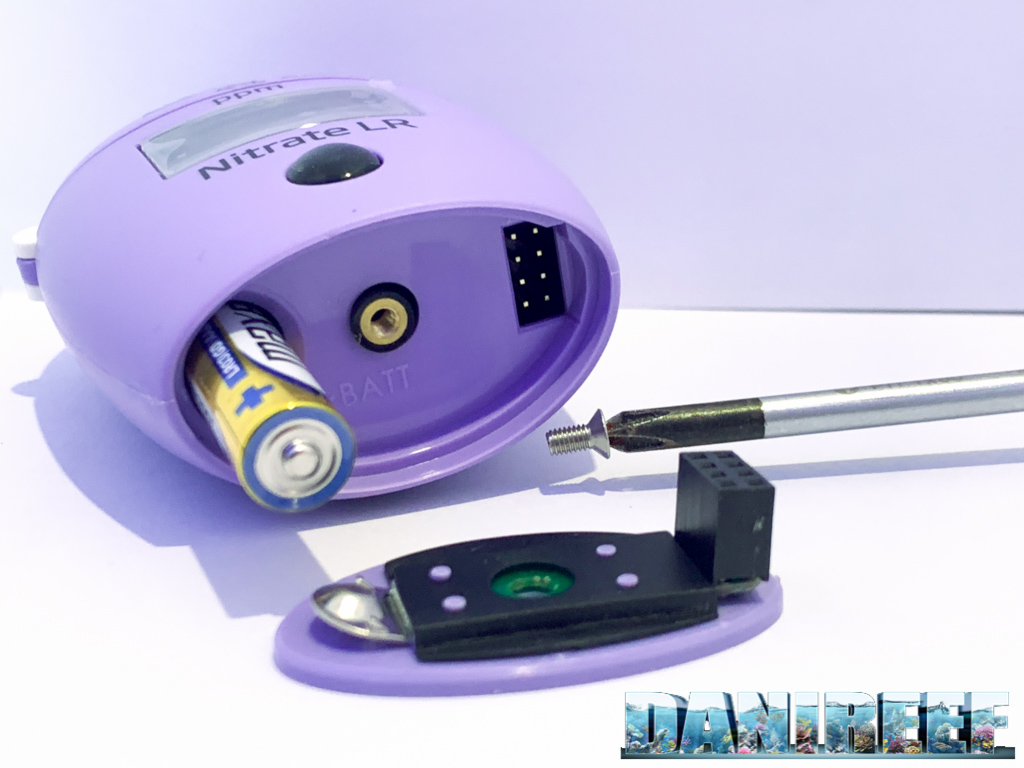
Like the previous devices the Checker HI781 has one only button, very visible on the front and slightly gummy. This is the only interface with the electronic part of the test.
We can devide the procedure in two phases:
PHASE 1 – Calibrations

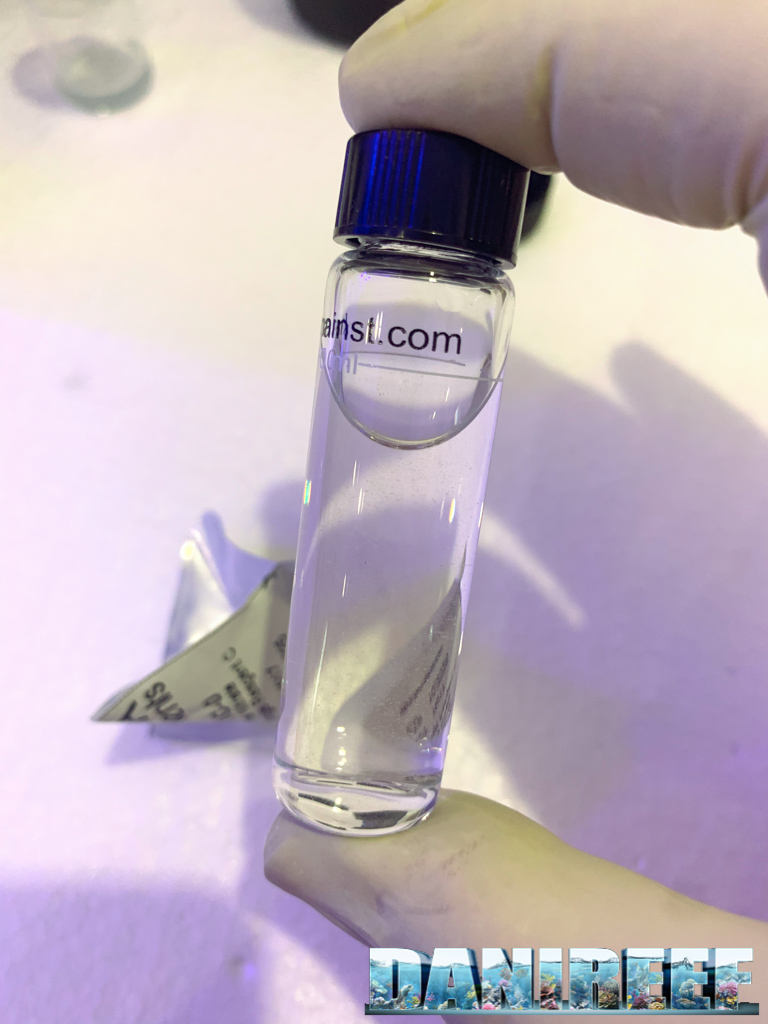
- Using the syringe of 10ml, withdraw 7 ml of the water you want to analyze and place it in the bigger cuvette.
- Using a medium syringe of you add 4 ml of the reagent HI781A-0 (in bottle);
- Open and pour a complete packet of reagent HI781B-0;
- Close it with the top and shake energically for 1 minute;
- Insert the blunt needle in the big syringe of 10ml and withdraw the content of the blending cuvette;
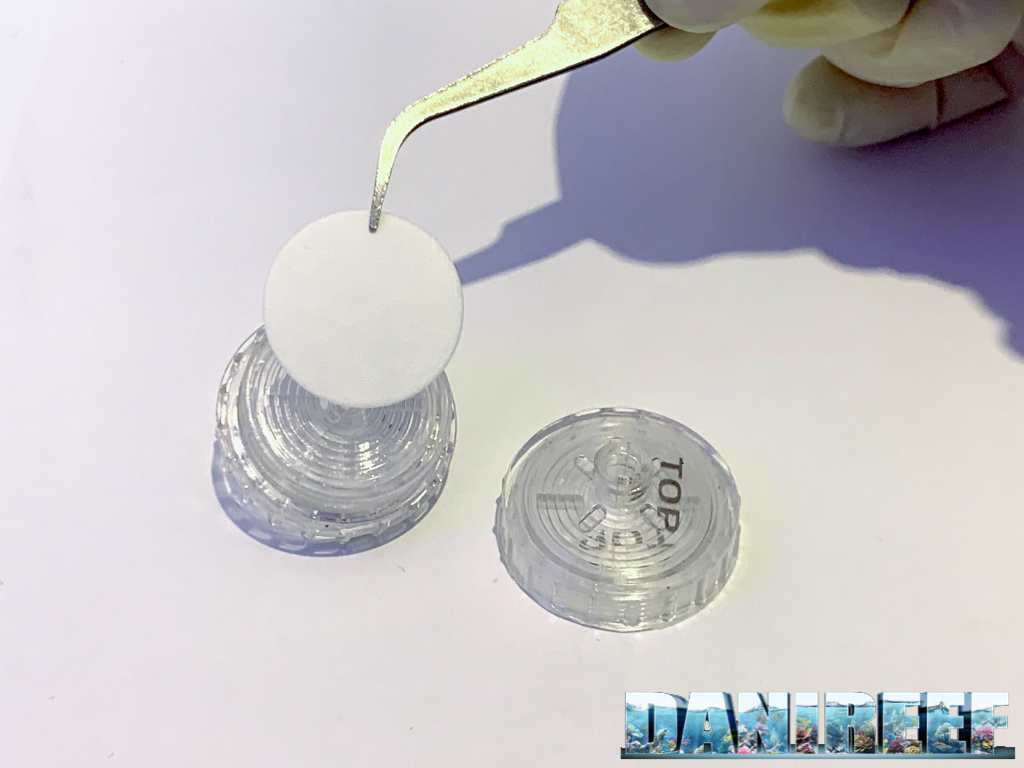
- Prepare the filter holder inserting a paper membrane and folding the two enclosures;
- Insert the filter holder in the thread of the big syringe;
- Pour carefully the whole syringe content in one of the little cuvettes, paying attention to filter it. Once reached the thread of the 10ml on the glass close the cuvette with the black top;
- Switch on the device pressing the button (the device will show the indication ADD C1 with and PRESS flashing);
- Clean carefully the cuvette with a cloth and put it on again in the spot in the checker and close the top;
- Press the ON/OFF button (after the display will show the indication ADD C2 with the flashing PRESS inscription);
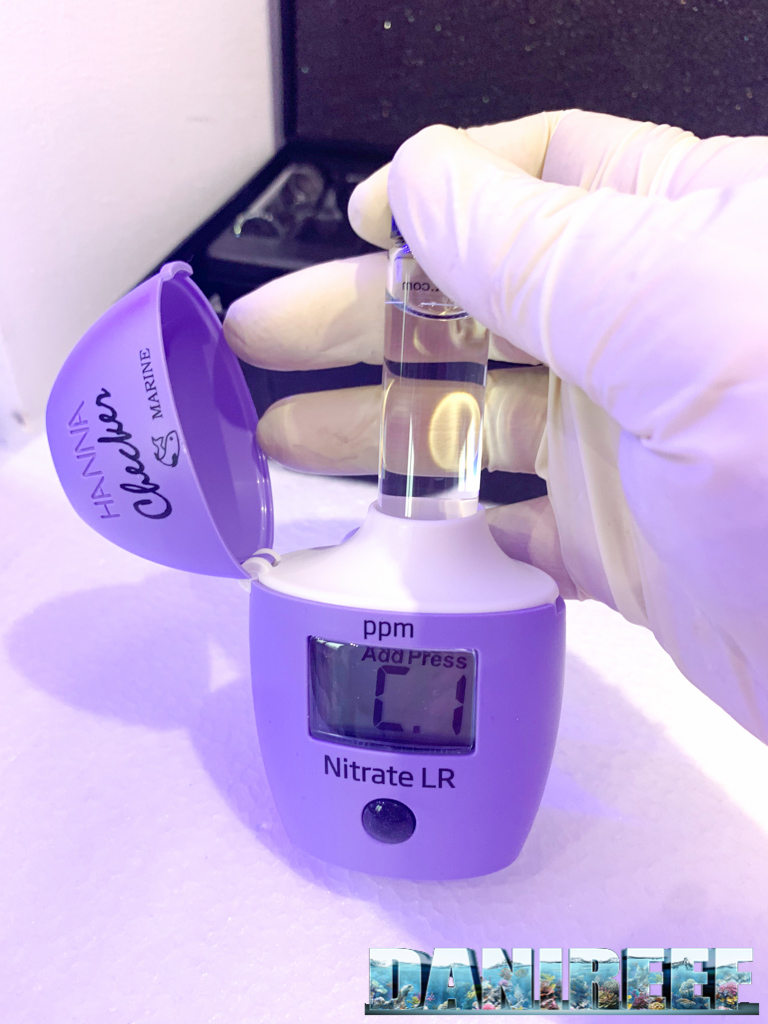
This shows that the device has completed the procedure of calibration.
PHASE 2 – Measurement
- Remove the cuvette from the housing, remove the top and pour a whole packet of the reagent HI781C-0;
- Close the cuvette and shake energically for 2 minutes;
- Clean carefully the envelope with a cloth and then put it back in the housing of the checker and close the top;
- Press and keep pressed the ON/OFF button to start the measurement (the display will show the countdown of 8 minutes at the end of which there will be final reading);
At the end of the countdown the display will show the value of nitrates (NO3) in ppm found in the water. With this passage we completed the measurement.
As you saw the procedure is slightly longer than a traditional teest, but not so complicated as it may seem.
Many of the operation need to reset the device and calibrate it on the parameters of the water. This is necessary because we have to remedy to the problem of interference that the chlorides give to the optical measurement. It’s clear that the water is rich of chlorides (first of all the sodium chloride of the salt). This makes difficult to discriminate the nitrates alone if we didn’t reset the present chlorides before.
This is the main reason why it has always been difficult to develop a reliable photometric test for NO3. Think that until last year the ICP analysis didn’t gave results for nitrates and phosphates.
The reading at high scale
Let us don’t dwell in the explanation of the diluition procedure that you can find both on the manual and on the video guide. The tools are in the base kit anyway. Remember that this procedure allows to extend the reading over the nominal scale of the 5 ppm until a maximum of 50 ppm. Please see the manual for the operations to do before you follow the steps after the 3rd.
The results obtained with this procedure have to be multiplied by 10.
Useful tricks
After some tests we want to recommend you these tricks while you do the test:
- [Point 6] When you insert the paper envelope in the filter holder make sure not to touch it with dirty hands. Moreover, make sure that it fits properly the housing and that no flaps are formed on the outside: they may lead to an unperfect closure of the enclosures;
- [Point 8] The filtering procedure and the refilling of the cuvette should be done slowly and costantly. Hanna explains that you should use 30 seconds for doing this correctly;
- All the cuvettes should be cleaned with osmosis water only and then wiped off because, with a test so specific, even a small drop or two on the glass would influence the final result.
- [Point 10] [Point 3 phase 2] Before inserting any cuvette in the housing of the egg you should remove any stain and residual with a clean cloth. This because any kind of dirt could distort the reading of the optical sensor.
- [Point 4 phase 2] When you press the button for starting the second phase, that is real measurement, remember to keep it pressed for some istants, otherwise the device won’t start with the countdown but will immediately give the result of the measurment. This result would be wrong by any chance because enough time hasn’t passed to complete the chemical reactions. You’ll have to throw all away and start again. If you don’t trust the timer you can wait 8 minutes and then press the button to obtain the result.
- At the end of the test wash all the cuvettes, the syringes, the needles and the filter holder with osmosis water, and wipe everything.
- Don’t use the water tank to wash the material before you use it because it can increase the amount of salt.
- During the diluition procedure, you have to add artificial marine water with 0 nitrates to the withdrawn sample of 1 ml. This means that you have to keep at hand some water prepared with RO and marine salt of the same concentration of the tank. Don’t do the diluition with the tank of the water: it would lead to completely different results from the real ones.
The field test
We tested the Checker HI781 for nitrates by comparing some classic test that we owned to verify the real correspondance of the results. In order to do this, we used two brand new tools and we did the measurements at the same time.
At first we did a trial test using osmosis water at 0 TDS, produced by an implant formed by 3 pre-filtration glasses, an osmosis membrane of 75GPD and two post-filtration glasses, the former loaded with deionized resins and the latter loaded with anti-silicates. As it was fair to expect, the result of test was 0.0 for both tests.
Then we withdraw the water of a grown tank with bot LPS and SPS, and we did two measurements comparing the results with the ones of two classic tests known for their reliability, correctly preserved and open for few weeks.
These are the measurements collected:
- Test 1 – value included between 0,0 and 1,0 ppm (one measurement only)
- Test 2 – value included between 0,0 and 0,5 ppm (one measurement only)
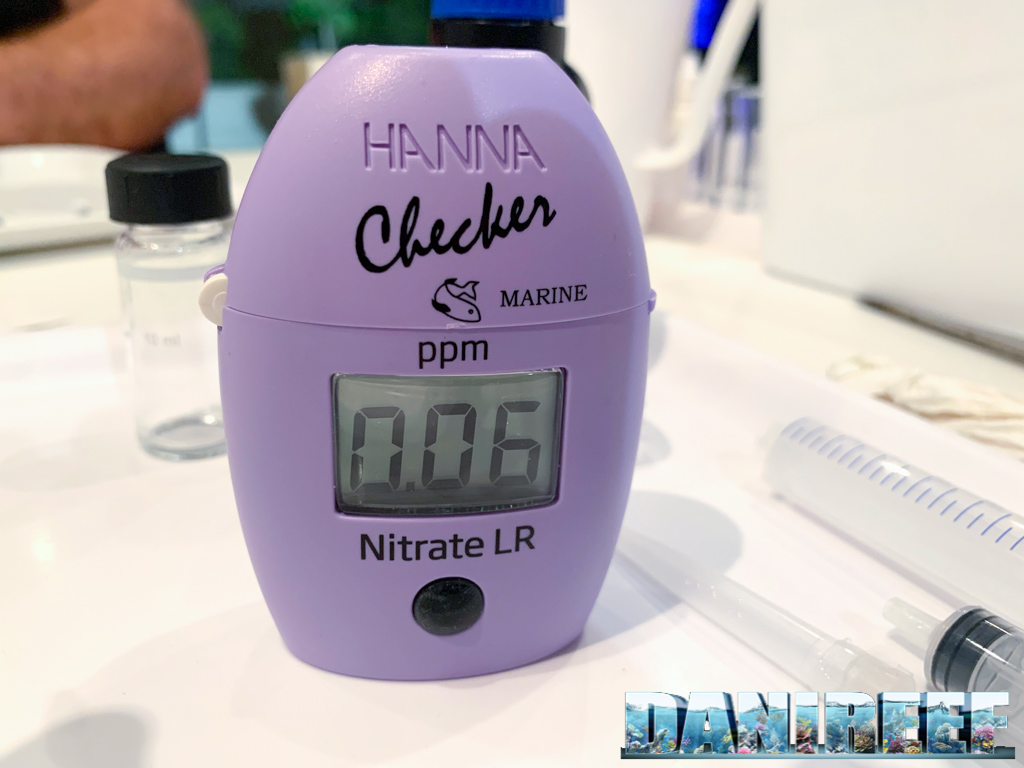
HI781 device #1 – 0,06 ppm
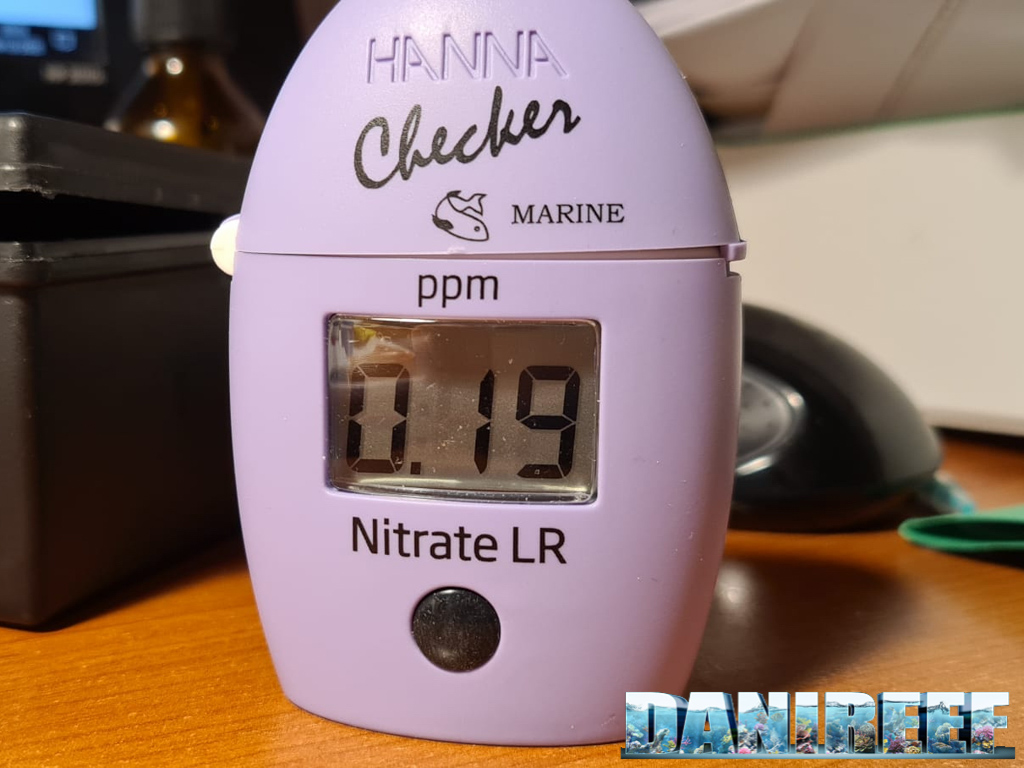
HI781 Device #2 – 0,19 ppm
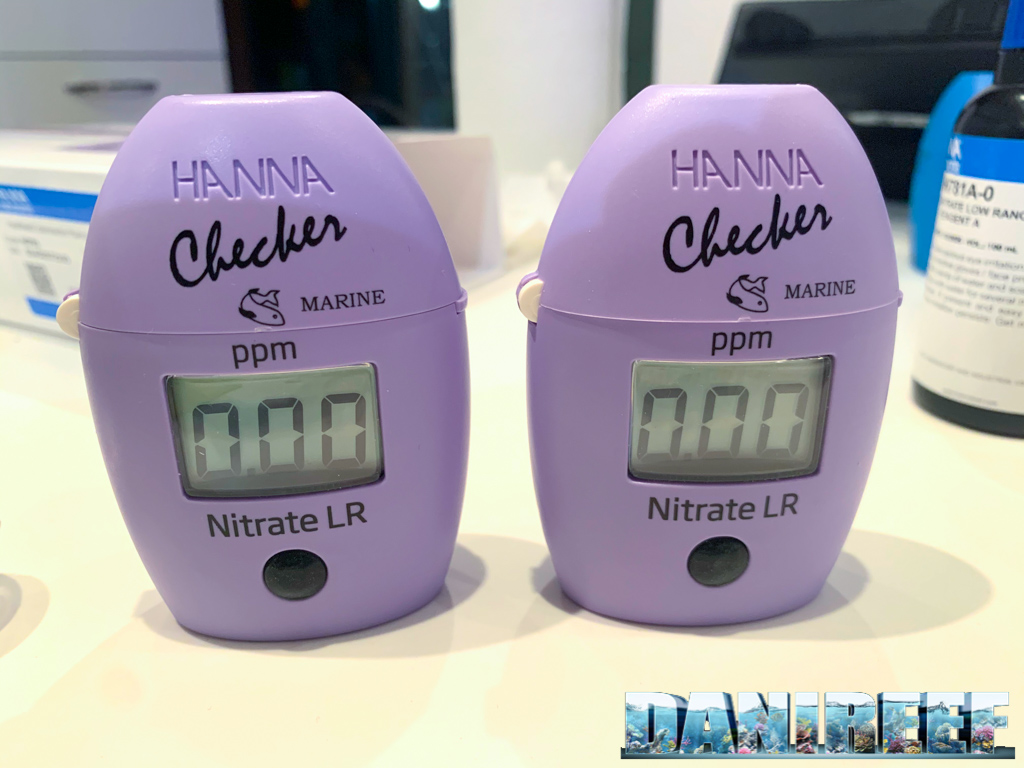
Then we repeat the test with the water of my tank, of about 40 days of activity, in the last phase of the maturation, but the organic part is almost none.
These were the results:
- Test 1 – value included between 0 and 1 ppm (one measurement only)
- Test 2 – 0,00 ppm (one measurement only)
- HI781 device #1 – 0,00 ppm
- HI781 device #1 – 0,00 ppm
For the last measurement we went to Jonathan‘s to test the water of his beautiful tank (that you can see in this article).
Even in this case the device gave us a reading of 0.00 ppm.
You can see this test and the explanation of the procedure in our video.
In conclusion
And here we are at the end of our first experience with this new device. I have to say that the first impression of the package and its contain gave me some doubts. So many objects and a new procedure, that seemed very complex… But straight at the fist use they proved me wrong and it was a real satisfaction to see that the test really is accurate and precise, even if it takes a few more minutes then the classic tests.
Precise and reliable
The tests done with the two eggs gave very precise readings, giving the same results in two readings out of three. Even the difference between one device and the other is really minimal (0,13 ppm) and sure in line with the declared indeterminacy range, of 0,25 ppm +/- 2%.
Howhere you can find some difficulties when you do readings close to 0.0, where the real vale is hard to discriminate.
But we definitely suggest Checker HI781 to every aquarist.
It’s a “best-buy” for sure for those who need a precise reading. It’s always a good purchase even those who have problems or doubts in figuring out the values of the colorimetric scales of the classic tests.
Great quality/price ratio
If you don’t consider the initial purchase of the egg, the cost for each test is 1€ quite cheap, even if it isn’t the cheapest on the market. I think that for more accuracy and precision a few cents more are a fair request.
As said before nothing is better to a device whose reading is easy and univocal. The value on the display is the same no matter who is taking the test, or when, in which part of the day, or if we use a LED source or a lamp, and this really is priceless!
PROS
![]() Reading easy and clear.
Reading easy and clear.![]() Good qualities of the materials and complete dotation.
Good qualities of the materials and complete dotation.![]() Cost per test quite cheap.
Cost per test quite cheap.![]() The reagents have a longer expiry date than classic tests.
The reagents have a longer expiry date than classic tests.
CONS
![]() Difficulty in the relevation of values close to 0.0.
Difficulty in the relevation of values close to 0.0.![]() The procedure takes longer than the classic tests.
The procedure takes longer than the classic tests.
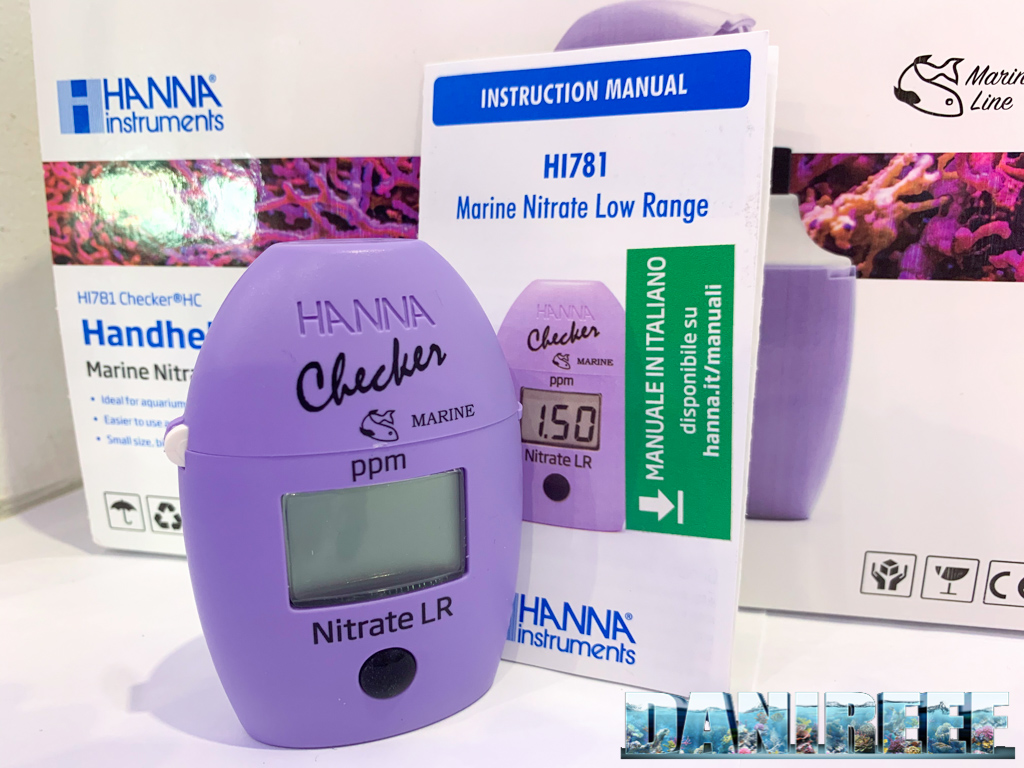
HANNA CHECKER HI781 FOR LOW RANGE NITRATES IN SALT WATER
| Construction quality | |
| Quality | |
| Quality/price ratio |
And what do you think?
Let us know and good measurements to everybody!


